

Today I have a very special 1st birthday card to share. I have had the privilege of seeing this little guy grow so big in just a year. He is just about to walk and get into everything. I wanted to make a very special card that his mom could put in his baby book. Over on ScrappyDews FB page, Ken of Kens Kreations graciously shared a card in a box pattern. (Michelle has also converted this pattern to MTC. You can LIKE the page and grab it here https://www.facebook.com/ScrappyDewCreations, you have to scroll and look at all the amazing projects though....) I knew I just had to try my hand at this type of a card.
I am going to give you the lyrics first (because I used a bunch of ScrappyDew files) So here we go:
http://shop.scrappydew.com/shop/item/88415 Birthday Boy Cake Smash 2013
http://shop.scrappydew.com/shop/item/86985 Bear Clowns 2013
http://www.dash12.com/scrapfactory/ I made the hair for the baby boy with this program
I used Recollections paper through out this project.
So let's get this party started!!!
****ONE IMPORTANT NOTE, I DID NOT USE ANY GLITTER ON THIS PROJECT. LITTLE ONE MIGHT GET A HOLD OF IT AND GLITTER ISN'T GOOD FOR KIDS OR PETS****
I cut the card out of a shiny blue 12 x 12 sheet. Gotta have blue for a boy's card. Just to let you know I didn't put the card together UNTIL I had all the elements made and I dry fitted everything together. I had scaled all the elements to fit on each side of the box and then cut and glued them together. I wanted balloons staggered in back of the little boy. I also wanted them to move a bit. Ah, a clear acetate sheet would work. So I took myself to Staples. Staples wanted over $60 for 50 sheets of acetate. Needless to say I did NOT buy this. But what to use. Here is my solution.
 |
| I am using a clear 2 liter pop bottle |
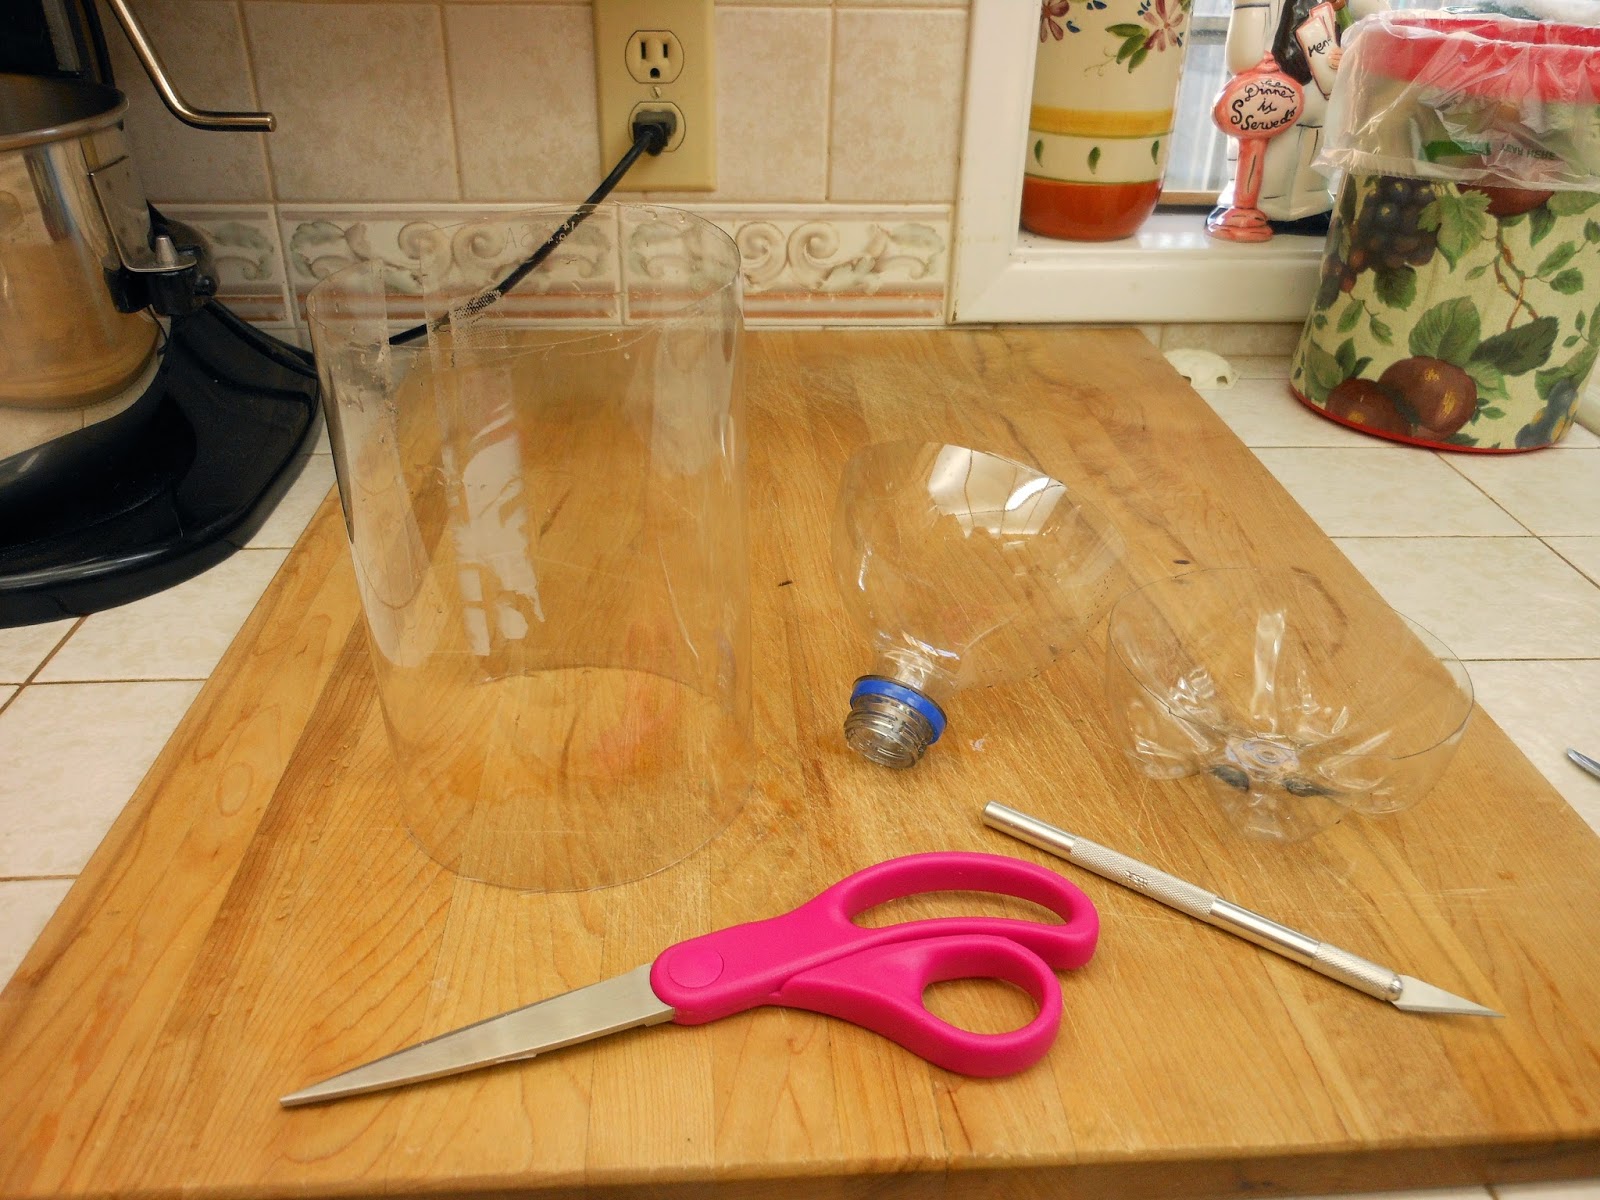 |
| Cut both ends off, and cut down the length of the bottle. |
 |
| Rolled and flattened the plastic sheet and cut 1/2 inch strips |
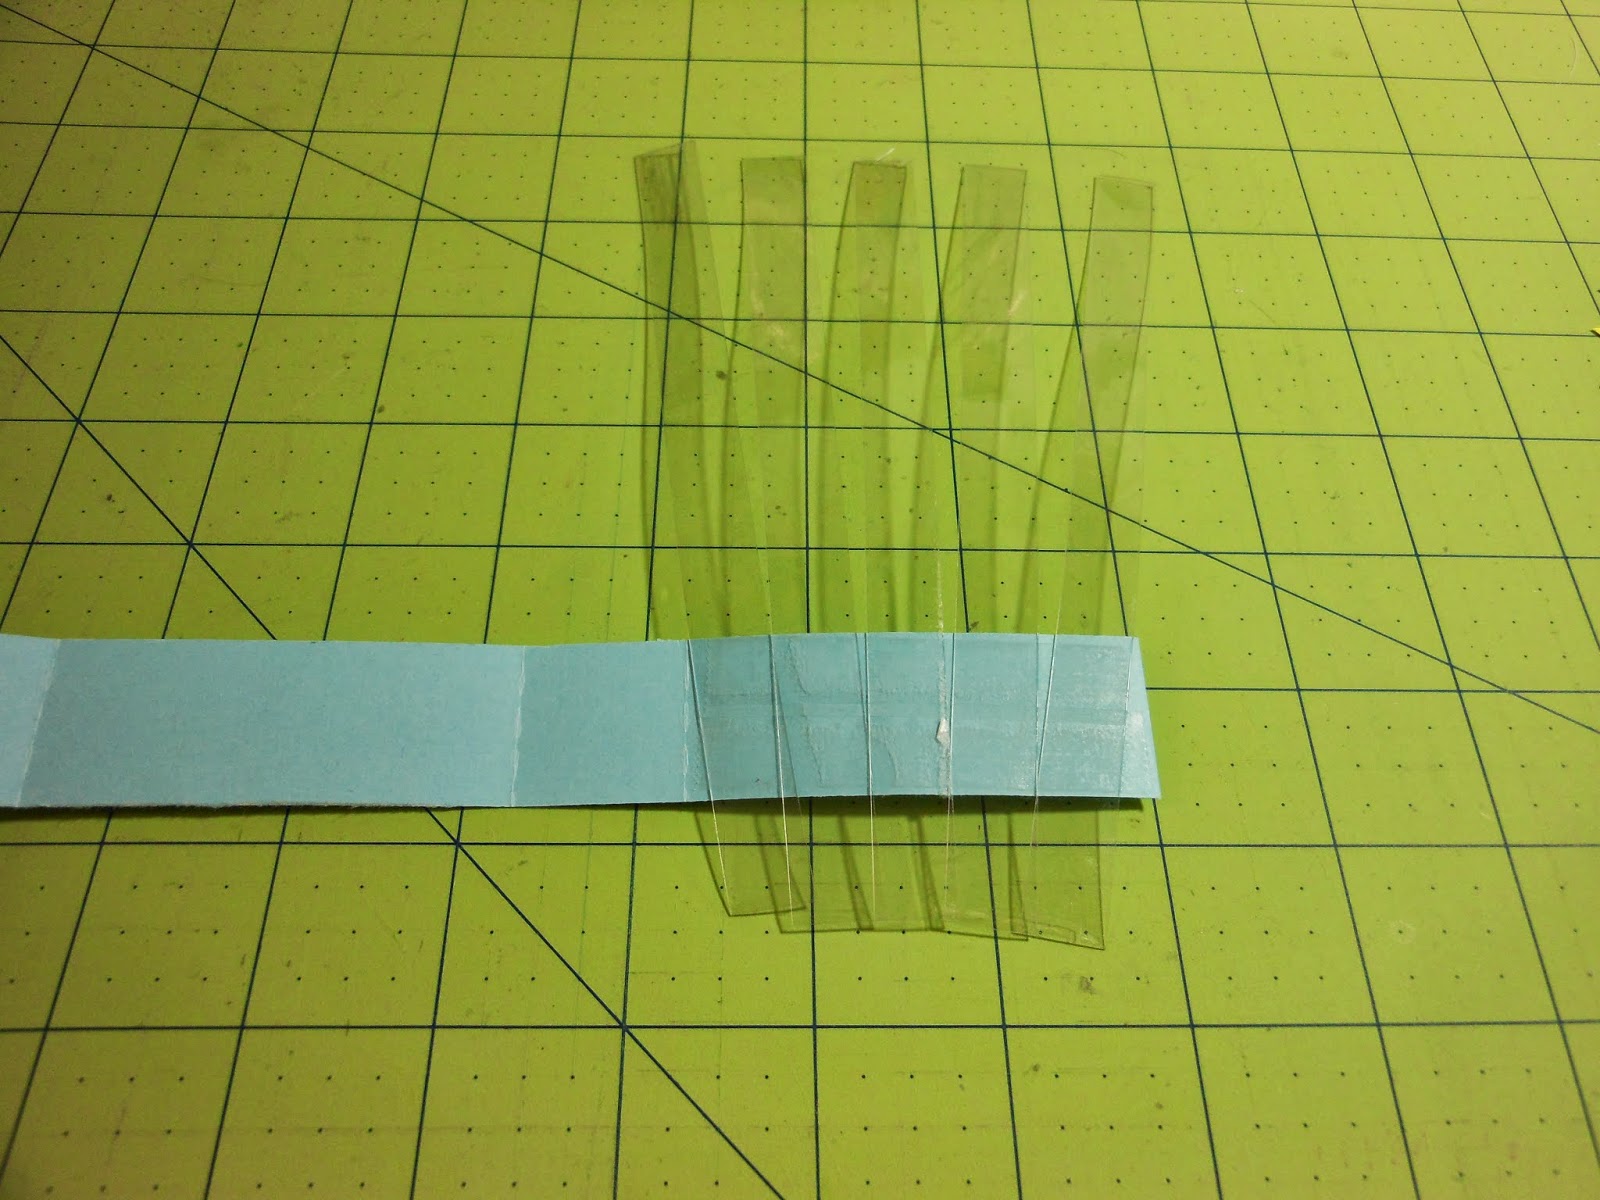 |
| Using doubled sided tape, I attached these to the inside frame |

 |
| I attached my pretty paper. You can see the plastic strips and they do wave back and forth. Just what I wanted and cost me a plastic bottle deposit. |
 |
| Card laying flat |
 |
| The inside |
 |
| The finished birthday card |
I hope that you get some inspiration to try this yourself. It is a fun project and I hope to make more.
For next weeks design team project, I am making an Easter Door Decoration for my girls. I promise you lots of sparkle and glitter!
Bright Blessings for the coming week, Jana
OMG!! I just love this. It's so cute. This is a party in a box!! :) The parents are going to love it! Fantastic Job, Jana.
ReplyDeleteMichelleMyBelle
DT Leader and Facebook ADMIN for ScrappyDew.com
very cute!!! want to make one but feel intimidated, may try it now! Thanks
ReplyDelete